How to Install WSL2 on Windows Server 2022 (Without Breaking Everything)

You’ve launched yourself a shiny new Windows Server 2022 installation and heard that WSL2 (Windows Subsystem for Linux) is where all the cool kids are hanging out. But, of course, Microsoft hasn’t exactly made it intuitive to enable WSL2 on a server OS. My pain is now your guide pleasure. Here’s how you can install WSL2 on Windows Server 2022 without wanting to throw your server out the window.
Step 1: Enable WSL and Virtual Machine Platform Features
Yeah, WSL2 needs some features turned on first. You can’t just snap your fingers and have it ready. Open up PowerShell as an Administrator (you’ll be doing this a lot, so get used to it) and run these two commands:
dism.exe /online /enable-feature /featurename:Microsoft-Windows-Subsystem-Linux /all /norestart

dism.exe /online /enable-feature /featurename:VirtualMachinePlatform /all /norestart
Translation: This turns on the necessary parts of Windows to run WSL2, and yes, you need both the Linux subsystem and the Virtual Machine Platform. Don’t ask why; just accept it, yes it breaks things sometimes, no there's nothing I can do about that (yet).
Step 2: Restart Your Server
You’ll need to restart your server now, so go ahead and get that out of the way. You don’t want to skip this, trust me.
Step 3: Set WSL2 as the Default Version
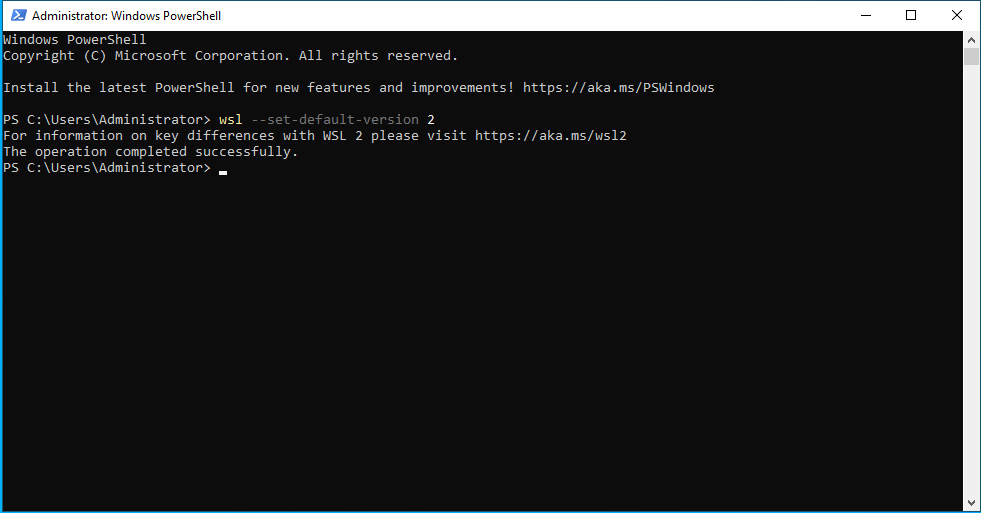
After your server’s rebooted, set WSL2 as the default version. This makes sure that any Linux distributions you install will run on WSL2 instead of the older, slower WSL1. Run this in your friendly neighborhood PowerShell:
wsl --set-default-version 2

Step 4: Get Your Linux Distro (Manually, Of Course)
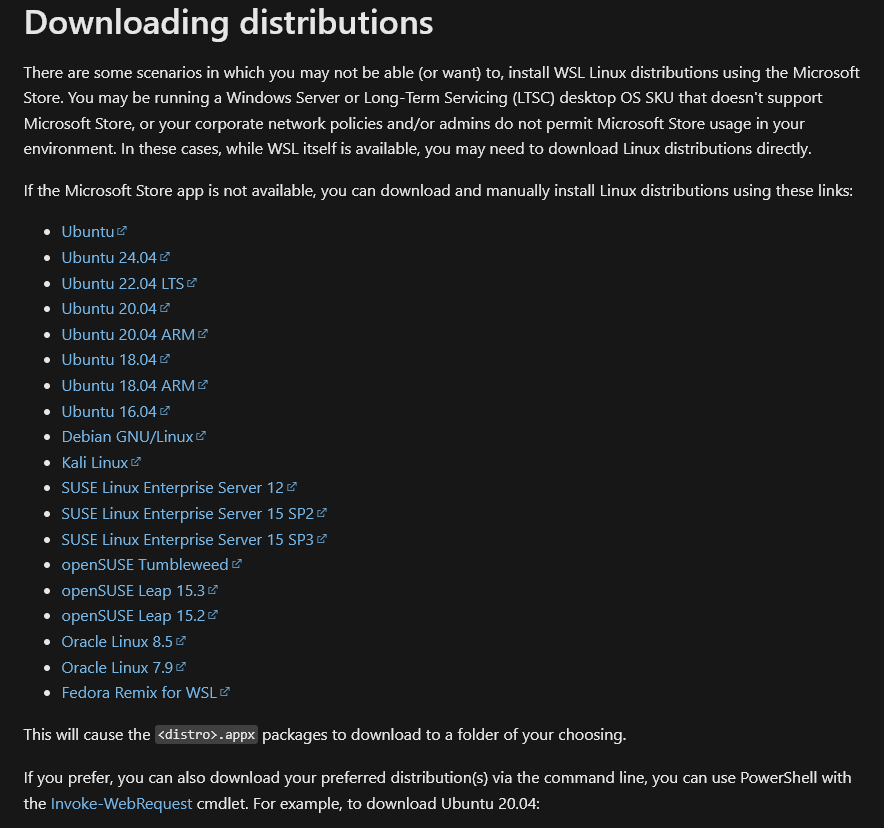
Here’s where things get a little more manual. Since we’re dealing with Windows Server 2022, we don’t get the luxury of the Microsoft Store. You’ll need to download the Linux distribution you want directly from the publisher’s site. This could be Ubuntu, Debian, or whatever flavor of Linux you’re into.
Once you’ve downloaded your .appx file, install it using (you guessed it) PowerShell:
Add-AppxPackage .\path\to\downloaded\appx
Replace path\to\downloaded\appx with the actual path of your downloaded distro.
Step 4 explained: Installing Ubuntu on Windows Server 2022 with WSL2
Because documentation is great:
Step 4.1: Download the Ubuntu Distribution
First, go to the official Ubuntu page for WSL distributions and download the .appx package. Here's the link you’ll want to use: Ubuntu WSL Appx.

Make sure you’re downloading a version that works well with WSL2. Typically, the LTS (Long-Term Support) versions like 20.04, 22.04 or 24.04 are safe choices. Once you’ve got the .appx file downloaded, you’re ready to install.
Step 4.2: Install the Ubuntu Appx Package
Open PowerShell as Administrator and navigate to the directory where the .appx file is located. For example, if you saved the file in C:\Downloads, you’ll need to go there:
cd C:\Downloads
Now, install the package with the following command:
Add-AppxPackage .\Ubuntu.appx
Replace Ubuntu.appx with the actual filename if it’s different (e.g., Ubuntu-20.04.appx). This will install Ubuntu onto your Windows Server 2022 system under WSL2.
Step 4.3: Launch Ubuntu for the First Time
After installing, you can launch Ubuntu by typing Ubuntu in either PowerShell or the Start menu. The first time you launch it, Ubuntu will go through an initialization process. This may take a few minutes, so be patient. Once that’s done, you’ll be prompted to set up a new user and password for your Linux environment.
Enter new UNIX username: [your_username]
Pick something easy to remember because you’ll be typing this a lot.
Step 4.4: Update and Upgrade Ubuntu (Highly Recommended)
You now have Ubuntu running on Windows Server 2022 under WSL2, but it’s probably outdated. So let’s fix that by updating the package list and upgrading all installed packages:
sudo apt update && sudo apt upgrade -y
This will make sure your Ubuntu environment is fully up to date and ready for whatever workloads you throw at it.
Optional: Install Additional Tools
At this point, you can install any additional packages or development tools you need for your work. For example, to install git, you would run:
sudo apt install git
You can repeat this process for other packages like Docker, Node.js, or whatever else your homelab setup requires.
And You’re Done!
That’s it! You now have a fully operational Ubuntu environment running inside Windows Server 2022 via WSL2. You’re free to tinker, break things, and become the Linux guru you always knew you could be.
Step 5: Fire Up the Linux Distro
Time to boot up the distro you just installed. Launch it from the Start menu or PowerShell. The first time it starts up, it’ll set everything up and ask you to create a user and password. It’s just Linux.
Step 6: Update and Upgrade (Because You Know There Are Updates)
Now that you’ve got Linux running on Windows Server (finally), you’ll want to make sure everything’s up to date. Why? Because nothing ever ships fully updated. Run these commands inside your shiny new Linux terminal:
sudo apt update && sudo apt upgrade
Let the update/upgrade process finish. This might take a few minutes, so go grab a coffee or something.
Finally: Install Stuff You Actually Need
Now that everything’s working, you can install whatever packages or tools you need for your environment. Want to install Docker, Python, or that obscure CLI tool nobody’s heard of? Go for it. Just use your distro’s package manager, like apt on Ubuntu, and you’ll be golden.
Final Thoughts (Because Every Guide Needs One)
WSL2 on Windows Server 2022 is a great compromise to not wanting to give up full fat Microsoft support, but they sure don't make it as easy as on Windows 10/11. Still, if you follow the steps above, you’ll have it up and running without any major headaches. And let’s face it, a fully operational Penguin environment inside your Windows Server is worth a little hassle.


